Homing the machine is one of the most important parts of a CNC. Without homing the machine no CNC machine can be used to its full potential and can result in the crashing of the machine as the controller does not know the position of the axis on power-up. This page shows how to set up homing on your machine.
The limit interface terminals for the six axes are located here:

They are all triggered by low-level signals.
Therefore, only NPN-type switches are supported.
Supports normally open/normally closed limit switches.
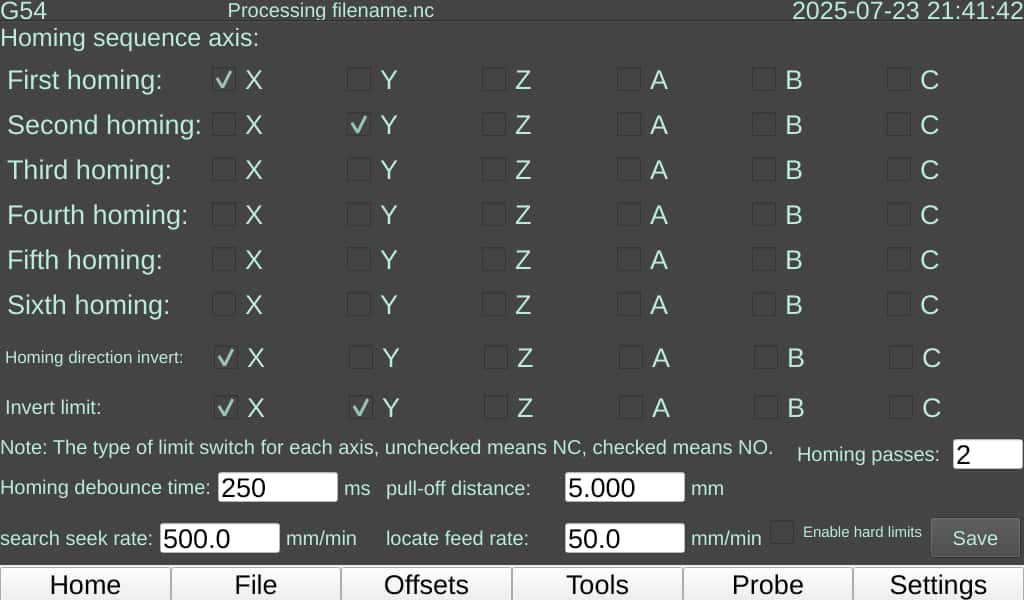
In the homing settings, you can set the homing sequence. Typically, a CNC machine will home the Z-axis first, and then home the X and Y axes simultaneously to avoid colliding with the workpiece.
If the homing direction is reversed, you can invert that axis. Additionally, make sure that the type of limit switch you are using—Normally Open (NO) or Normally Closed (NC)—matches the configuration in the settings.
The motion control part of this controller (the low-level system) is based on grblhal. Therefore, in addition to clicking the <HOME> button on the control panel to home the machine, you can also send G-code commands. Use $H to initiate a full homing cycle, or $H followed by an axis letter (e.g., $HX) to home a single axis.
Note: We have found that some limit switches, despite being rated for 5-36V, may not function correctly with a 5V power supply. Although the indicator light on the switch itself may illuminate, it fails to trigger a valid limit signal in the controller. A 24V power supply is required for these switches to operate properly.


